Working with Magic Search from Bower

In a previous post, I talked about an AngularJS widget for searching. Now, that has been re-factored a little with an eye towards reuse and is available using Bower. There was a little discussion about re-use in the last post, but now the task is much simpler. If you are already using Bower, you can simply add “angular-magic-search” to your bower.json. The widget can now be integrated into your templates and leverages which ever flavor you use for resource location and parameter passing. For example, using Chameleon templates, we do the following:

<link rel="stylesheet" type-"text/css" href="${request.static_path('eucaconsole:static/js/thirdparty/magic-search/magic_search.css')}"/>
<script src="${request.static_path('eucaconsole:static/js/thirdparty/magic-search/magic_search.js')}"></script>
<magic-search
  template="${request.static_path('eucaconsole:static/js/thirdparty/magic-search/magic_search.html')}"
  strings="{'remove':'${layout.ms_remove}', 'cancel':'${layout.ms_cancel}', 'prompt':'${layout.ms_prompt}'}"
  facets="${search_facets}" filter-keys="${filter_keys}"></magic-search>

The first 2 lines pull in the CSS and JS files. The div tag sets the ng-app and contains the magic-search element. Attributes are used to set that up, including template location, strings (which were run through i18n), as well as facets and filter keys.

The facets value is a JSON structure that looks like this:

[
 {'name': 'owner_alias',
  'label': 'Images owned by',
  'options':
    [{'key': '', 'label': 'Anyone'},
     {'key': 'self', 'label': 'Me (or shared with me)'}]
 },
 {'name': 'platform',
  'label': 'Platform',
  'options':
    [{'key': 'linux', 'label': 'Linux'},
     {'key': 'windows', 'label': 'Windows'}]
 },
 {'name': 'architecture',
  'label': 'Architecture',
  'options':
    [{'key': 'x86_64', 'label': '64-bit'},
     {'key': 'i386', 'label': '32-bit'}],
 }
]

It is used to populate the facets and is specific to the data being presented. Note that labels should have been run through your i18n function. The filter-keys value is an array of names. These are passed with the “textSearch” event so that the code you write to perform live text filtering can know which data values to look at.

['architecture', 'description', 'id', 'name', 'owner_alias', 'platform_name', 'root_device_type', 'tagged_name']

The final piece is to listen for events emitted by the search bar.

$scope.$on('searchUpdated', function($event, query) {
 ...
});
$scope.$on('textSearch', function($event, text, filter_keys) {
 ...
});

In the first function, “query” is a query fragment generated by the search facets. One use may be to append that to a URL for an XHR call to retrieve a new data set from the server. The second function gets the “filter_keys” discussed above and “text” which is simply the text the user typed which is not part of a pre-defined facet.

Hopefully, this makes it easier to re-use magic-seach in your application!

(coming next, magic-search and bootstrap)

Magic Search : facets and text in a single widget for efficient search UX

The Eucalyptus console has historically taken different approaches to search. Early versions simply filtered by text on the client. The next version introduced faceted search by using the Visual Search widget. This worked OK since we adopted backbone.js and used a client-side data model. In an effort to free ourselves from so much javascript on the client (and less data on the client), we re-built the console from the ground up in 2014. We went with much more server-side processing and routing along with AngularJS on the client. We also went with a very basic form based filter set which used fetches from the server to apply those filters. We also supported text filtering via a small search-bar.

In all cases, the search was localized to data we were displaying in a table or grid view (user selectable). Search filters were very much context sensitive. For each page, we define a list of columns that text search applies to (and mostly all columns were specified). We also used the query string in the URL to specify filters, so filters became book-markable.

As I write this, we’re finalizing the 4.1 console, which is the second release of the new code-base. In planning for version 4.2, we decided we’d like to revisit the faceted search we tried before. The widget we had used required backbone and had no desire to introduce that into an Angular application. I also surveyed other search widgets and didn’t find anything that matched that level of functionality and UX. The decision was made to develop our own Angular widget. We have a feature branch on github

Screen Shot 2015-01-07 at 9.53.41 AM

How We Built It

Our console uses Chameleon templates for basic DOM structure and SASS for styling on top of Foundation. We started by creating a widget template which defined the magic search layout. It is decorated with a single foundation element to make it full-width as well as many Angular attributes. The Angular controller is what primarily drives the functionality of the search. A foundation dropdown menu is used to display search facets and value lists. Angular’s ng-repeat is used to render selected facets and items on the dropdown. The controller simply maintains lists of these things which are displayed as needed.

How to Use It

To actually use the magic search, you must initialize the controller with a list of facets in JSON and a list of filter keys (which are the columns used for text filtering). The magic search bar emits events when search actions are performed. An event called “searchUpdated” is emitted with a query string when filter facets are changed. An event called “textSearch” is emitted when text search changes. Live text filtering is supported by emitting this event for each character typed in the search input which does not match a facet.

The application can choose what to do with those 2 events. In our case, we use an XHR call to populate our tables. When the “searchUpdated” event is received a new XHR call is made using the query string. This causes a server-side fetch using the new filter values. Our application responds to the “textSearch” event by live filtering the existing list using the filter keys to inspect the objects that make up the list.

Usability

We paid a lot of attention to usability in our design. I worked with Jenny Loza to refine all of the user interaction. The user is initially presented with a blank search bar and some placeholder text. Upon clicking anywhere in the search bar, the list of facets is presented and focus is set for text input. The user may select a facet with the mouse or type. If they type and the text matches any text in the facets, the list of facets will be filtered (and matching text bolded). This lets the user use a few mouse clicks to filter items, or continue entirely with the keyboard. If the user chooses the keyboard, typing and tabbing will get them through as many facets as they wish to select (including text search). Alternatively, a user may select facets and values entirely with the mouse (excluding text search). Each facet can be removed by clicking a small X in the facet box. The entire search bar can be cleared by selecting an X to the far right. We chose not to support edit-in-place for existing facets since it is very simple to remove and add facets.

The magic search bar allows multiple facets and those are combined to reduce the set of results (using “and”). If the user selects multiple values for a single facet, those results are combined (using “or”). We find this very intuitive.

Screen Shot 2015-01-07 at 9.51.16 AM

Screen Shot 2015-01-07 at 9.51.53 AM

Screen Shot 2015-01-07 at 9.52.32 AM

Screen Shot 2015-01-07 at 9.53.13 AM

How Your Project Might Use It

I recognize that not everybody will use Foundation, or the same server-side templating (or even SASS). Here are some ways you could approach re-use in some form. In place of Foundation, you could use Bootstrap dropdowns. They use the same DOM structure as Foundation’s and similar activation, so this would be an easy switch. Note that the “hideMenu()” function in the Angular controller uses a Foundation call to close the dropdown, so that would need to be replaced as well.

Our reliance on a server-side template is very minimal. Two places insert hrefs for resources (css and js files). The other 2 template references are to send initialization values to the Angular controller. You could replace those fairly easily in your own application.

The last thing is SASS. We check in the generated css file, so you could simply use that instead of our .scss file. The only external reference our .scss file uses is a dark grey color used more widely in our application. Additionally, our application defines an item-list and item class which are used for facet display. Those can be found as a SASS mix-in here. It’s likely there are other classes in the widget that were re-used either from our application or Foundation’s own styles. I’ll try to document any further exceptions. Please notice we use 2 SVG icons from Foundation, fi-filter and fi-x.

Getting Involved

This feature is still in development, though we think there isn’t much left to change. I do expect to find bugs which we’ll fix in the 4.2 development process. The code can be viewed in the Pull Request where you can also comment. The key files are magic_search.pt, magic_search.js and magic_search.scss. There is a ticket which we use to track this feature. It includes a list of test criteria that we’ll use to create functional tests, and it should give you a better idea of the capabilities built into this widget. Feel free to contact me with any comments, suggestions, concerns or otherwise.

https://github.com/eucalyptus/eucaconsole/tree/magic_search

Adventures in memcached integration

As developers, we sometimes run into problems that are somewhat… challenging. That’s part of the fun of writing code though. I like trying to find clever ways to solve a problem. This was the case when trying to integrate memcached into the Eucalyptus Management Console.

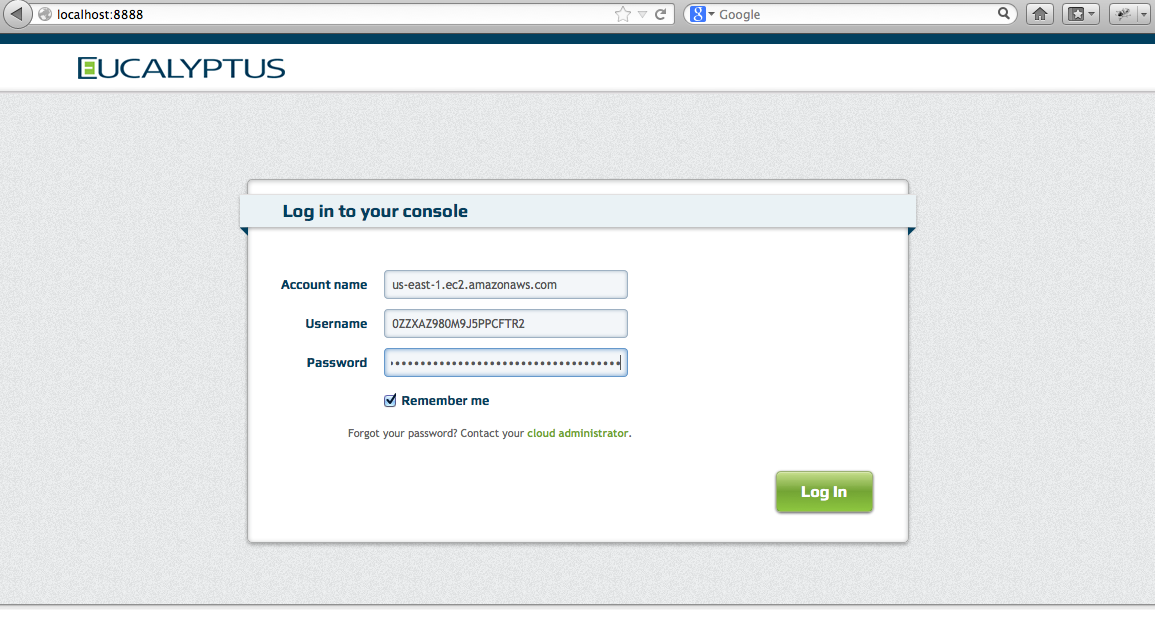
Version 4.0 of the console uses Gunicorn which utilizes separate worker processes to handle requests. To implement any kind of effective caching, we’d need a shared cache. Memcached is a pretty obvious choice. Since we were using pyramid, beaker seems like an obvious option. Beaker does have support for memcached, but as the author points out, dogpile.cache is a much better choice as a cache interface library. Dogpile.cache has backends for memcached, redis and others which allow for some more interesting choices architecturally.

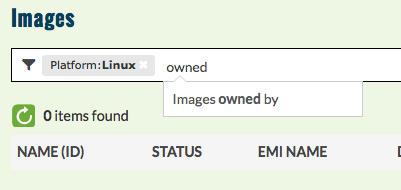
Our application uses boto to talk to both Eucalyptus and AWS. To start with, we wanted to cache image lists since they don’t change often and they can be fairly large. Dogpile.cache has regions you configure (generally for different expiration times). We set up short_term, long_term and others for our application. While working on a prototype for this, I ran into 2 main issues which I’ll cover in detail: pickle doesn’t handle all boto object graphs and invalidation of cache data.

Pickled Botos

We have an array of boto.ec2.image.Image objects that need to be cached. The memcached backend for dogpile.cache can use one of a few python interfaces to memcached. I chose to use python-memcached. It pickles the data before sending it to the memcached server. For those who don’t know, pickling is a way to encode python data and can be used to marshall and unmarshall object graphs. Anyway, some boto objects don’t marshall very well. I ran into this about 2 years ago when working on the first version of the console that used the JSONEncoder to send json versions of the boto objects to the browser as AJAX responses. I had to write my own JSONEncoder to handle the objects which didn’t marshall properly. The JSONEncoder supports passing your own implementation which handles object conversion, so that made life a little easier. The Pickler also supports this, but the implementation is buried down in the python-memcached package and there is no way to pass your own pickler down from the dogpile.cache layer. (I feel a pull request coming..) What I chose to do instead was to iterate over the image list and make adjustments to the objects graphs prior to storing in the cache. Certainly, this isn’t ideal, but it works for now. In doing this, I was able to delete some values out of the object graph which I don’t care about which saves time and space in the cache mechanism. I also found that (in this case) the boto.ec2.blockdevicemapping.BlockDeviceType object contained a circular reference which was causing the pickler to barf. I trimmed this out during my iteration and pickling worked fine!

The hard part was figuring out which object was causing the problem. I found a stackoverflow article that helped here. It showed how to extend the Pickler to either log what it was operating on, or catch exceptions (as I added for my purposes). Here’s my code;

class MyPickler (pickle.Pickler):
  def save(self, obj):
    #print 'pickling object', obj, 'of type', type(obj)
    try:
      pickle.Pickler.save(self, obj)
    except:
      print "--------- object dict = "+str(obj.__dict__)

I found it very helpful to see what object was causing the problem and could insert a breakpoint to inspect that object when the problem occurs. In the memcache.py file of python-memcached, I had to change an import so that cpickler wasn’t used. That’s a native pickler which is much faster, but doesn’t allow me to extend it in this way. This is clearly only a debugging tool and the standard package code should be used in production.

Invalidate == Delete

Each item stored in a cache region has a key generated. When using the @cache_on_arguments decorator, the cache key is created based on the string form of the arguments passed to the cache function. The decorator takes a namespace argument, so I was able to specify an additional key component so that any image values being cached all included “image” in the cache key. By default the key is also run through sha1 to create a digest to get consistent length (and obfuscated) cache keys. This works well and would have been all I had to do except that I couldn’t simply rely on the configured expiration of the cache region. There are cases where we needed to invalidate the set of data in the cache due to changes initiated within the application. In that case, our user would expect to see the new data immediately.

To invalidate, we would need to know the cache key used to refer to the data in the cache and perform a delete on the key. Since the cache key was generated for us, I had no idea what to use for deletion. I could have reverse engineered it, but if something changed in the underlying library, that could be fragile. Fortunately, a cache region can be given a key generator function when it is configured. We could use our own code to generate the cache key and call that again to invalidate the cache. This is the key generator I’m using:

def euca_key_generator(namespace, fn):
  def generate_key(*arg):
    # generate a key:
    # "namespace_arg1_arg2_arg3..."
    key = namespace + "_" + "_".join(str(s) for s in arg[1:])

    # return cache key
    # apply sha1 to obfuscate key contents
    return sha1(key).hexdigest()

  return generate_key

To use this to invalidate a cache (based on args), I wrote another function:

def invalidate_cache(cache, namespace, *arg):
  key = euca_key_generator(namespace, None)(*arg)
  cache.delete(key)

The namespace and arg list are passed to the key generator as you can see. This is merely a helper function. To invalidate the image cache, I needed to call the above function with the proper arguments. These are the same arguments passed in to the cache function (which uses the decorator).

The work on shared caching is currently in a branch, but will likely be merged into develop over the next month or so.

Size Problem

After beating my head against a wall for a while, I found there is a size limitation on memcached. It will only take values up to 1MB in size unless you recompile it. Fortunately, there is a handy solution. Since value get pickled, they do really well with compression. The python-memcached library supports compression, but you need to enabled it. By default the min_compress_len is zero, which means it never tries to compress the pickled data. In fact, the code silently returns from the set method having done nothing. This is where the frustration came in. I ended up spending some quality time in pdb to figure out that I could configure a dogpile.cache region with a min_compress_len greater than zero to get the underlying code to compress my data. Bingo! My large data set went from 3MB to 650K. This is how I configured my regions:

 long_term.configure(
     memory_cache,
     expiration_time = int(settings.get('cache.long_term.expire')),
     arguments = {
         'url':[memory_cache_url],
         'min_compress_len':1024,
     },
 )

I realize that 650K is not that far from 1MB, so perhaps splitting up the data will be needed at some point. The failure mode is simply a performance one, not so fatal.

Memcached Debug Tips

I learned a couple of things about monitoring my memcached server while debugging things. Two tips I found that will help are:

  • run memcached from a shell with -vv option. You’ll get useful output about get, set, send and delete operations.
  • telnet into the server using “telnet localhost 11211”. You can run commands like “stats” and “stats items”

Using the Eucalyptus User Console with AWS

At the end of last year, we (Eucalyptus) released version 3.2 which included our user console. This feature finally allowed regular users to login to a web UI to manage their resources. Because this was our first release, we had a lot of catching up to do. I would say that is still the case, but the point here is that we were able to test all of our features against Eucalyptus. As we add features to the user console which are currently under development in the server side, we must have the capability to test using the AWS services. Our API fidelity goal means that we are really able to develop against the Amazon implementation and then test against the Eucalyptus version when that becomes ready. Recently we did this for resource tagging. The server side folks have just finished implementing that, so we’ll be able to point the user console at our own server soon.

As a result of this need for testing with Amazon, we have hacked in a way to connect the user console with AWS endpoints. The trick is simple. In the login screen, there are 3 fields. Those fields are normally for account, username and password. To connect with Amazon, simply supply endpoint, access key and secret key in that order, in the account/user/password fields, like in the picture below

AWSLogin

After logging in, you can use all of the features in the user console against your AWS account. One difference is in how images are handled. Because of the very large number of public images (14 thousand at last count), the user console will only show images owned by (or shared with) the AWS account. The picture below shows what you might see on the dashboard. Notice the access key and endpoint appear to the upper right.

AWSDashboard


You may notice the large number of snapshots shown. This includes all public snapshots, and maybe need to be limited to those owned by the user at some point.

The code is currently in the testing branch on github. https://github.com/eucalyptus/eucalyptus/tree/testing

Eustore, a set of image tools for your cloud

I want to talk about something new we’re working on at Eucalyptus, but first let me start with a little background. Quite simply, it is a hassle to get an image installed. The current process for Eucalyptus (as we document it) is to download a tarball, untar it, bundle/upload/register the kernel/ramdisk and image itself. That’s about 11 steps. We thought there must be a simpler way to do this.

What we came up with is eustore. In the spirit of euca2ools (euca- and euare- commands), eustore commands give  you access to a Eucalyptus image store. That’s store, as in storehouse, not a shop. We have some updated “base” images available on our servers. We have a catalog file that contains metadata about those images. The eustore tools simply give you access to those, and let you issue a single command to download an install an image on your local cloud (or any Eucalyptus cloud you have access to).

The code has been checked in with the euca2ools. To install and use the commands, you’ll need to build from source and tweak the setup.py. Let’s go over that now.

If you don’t have bzr, you’ll need to download it and grab the code with


bzr branch lp:euca2ools

You’ll find the eustore commands in euca2ools/commands/eustore. The commands still need to be added to setup.py, as does the package to get it installed with the rest of euca2ools. Here’s s patch script you can apply with “patch -p0 <setup.patch” (assuming you copy this into a file named setup.patch);

--- setup.py 2012-01-20 17:17:48.000000000 -0800
+++ setup.py 2012-01-20 17:18:53.000000000 -0800
@@ -161,10 +161,13 @@ setup(name = &quot;euca2ools&quot;,
 &quot;bin/euca-unbundle&quot;,
 &quot;bin/euca-unmonitor-instances&quot;,
 &quot;bin/euca-upload-bundle&quot;,
- &quot;bin/euca-version&quot;],
+ &quot;bin/euca-version&quot;,
+ &quot;bin/eustore-describe-images&quot;,
+ &quot;bin/eustore-install-image&quot;],
 url = &quot;http://open.eucalyptus.com&quot;,
 packages = [&quot;euca2ools&quot;, &quot;euca2ools.nc&quot;, &quot;euca2ools.commands&quot;,
- &quot;euca2ools.commands.euca&quot;, &quot;euca2ools.commands.euare&quot;],
+ &quot;euca2ools.commands.euca&quot;, &quot;euca2ools.commands.euare&quot;,
+ &quot;euca2ools.commands.eustore&quot;],
 license = 'BSD (Simplified)',
 platforms = 'Posix; MacOS X; Windows',
 classifiers = [ 'Development Status :: 3 - Alpha',

Once that file is patched, installing euca2ools (+eustore) is as simple as running (as root)

python setup.py install

Once you do this, you’ll have access to 2 new commands; eustore-describe-images and eustore-install-image. Here are the command summaries;

Usage: eustore-describe-images [options]

Options:
 -h, --help show this help message and exit
 -v, --verbose display more information about images


Usage: eustore-install-image [options]

Options:
 -h, --help show this help message and exit
 -i IMAGE_NAME, --image_name=IMAGE_NAME
 name of image to install
 -b BUCKET, --bucket=BUCKET
 specify the bucket to store the images in
 -k KERNEL_TYPE, --kernel_type=KERNEL_TYPE
 specify the type you're using [xen|kvm]
 -d DIR, --dir=DIR specify a temporary directory for large files
 --kernel=KERNEL Override bundled kernel with one already installed
 --ramdisk=RAMDISK Override bundled ramdisk with one already installed

eustore-describe-images list the images available at emis.eucalyptus.com. You have the ability to change the url (using the EUSTORE_URL environment variable which is helpful sometimes). The output looks like this;

centos-x86_64-20111228 centos x86_64 2011.12.28 CentOS 5 1.3GB root
centos-x86_64-20120114 centos x86_64 2012.1.14 CentOS 5 1.3GB root
centos-lg-x86_64-20111228centos x86_64 2011.12.28 CentOS 5 4.5GB root
centos-lg-x86_64-20120114centos x86_64 2012.1.14 CentOS 5 4.5GB root
debian-x86_64-20111228 debian x86_64 2011.12.28 Debian 6 1.3GB root
debian-x86_64-20120114 debian x86_64 2012.1.14 Debian 6 1.3GB root
debian-lg-x86_64-20111228debian x86_64 2011.12.28 Debian 6 4.5GB root
debian-lg-x86_64-20120114debian x86_64 2012.1.14 Debian 6 4.5GB root
ubuntu-x86_64-20120114 ubuntu x86_64 2012.1.14 Ubuntu 10.04 1.3GB root
ubuntu-lg-x86_64-20120114ubuntu x86_64 2012.1.14 Ubuntu 10.04 4.5GB root

To install one of these images on your local cloud, you’d use eustore-install-image like this;

eustore-install-image -i debian-x86_64-20120114 -b myimages

This command installs the image named into the myimages bucket on the cloud you are setup to talk to. As with all euca2ools, you’d first source the eucarc file that came with your cloud credentials. I should point out something about uploading kernel and ramdisk to your cloud. Only the admin can install these. If you have admin credentials, the above command will work fine. If you don’t and want to install an image anyway, you would use the –kernel and –ramdisk options to refer to a kernel id and ramdisk id already installed on the cloud. That way, this command will ignore the kernel and ramdisk bundled with the image and refer to the previously uploaded ones.

The project management is happening here: https://projects.eucalyptus.com/redmine/projects/eustore/

It is discussed during the images meetings on IRC  (calendar here)

Automating EBS Volume Attach at Boot Time

A few years ago, I found myself attaching volumes to instances with some frequency. The volume often came from a snapshot which contained some test data. Like any lazy programmer, I didn’t want to do this work over and over again! I wrote this little utility which would examine the user data and mount a pre-existing volume, or create a new volume from a snapshot and attach that. Here’s the code;

import java.io.IOException;
import java.util.List;
import java.util.StringTokenizer;

import com.xerox.amazonws.ec2.AttachmentInfo;
import com.xerox.amazonws.ec2.EC2Exception;
import com.xerox.amazonws.ec2.EC2Utils;
import com.xerox.amazonws.ec2.Jec2;
import com.xerox.amazonws.ec2.VolumeInfo;

public class AttachVolume {

	public static void main(String [] args) {
		try {
			String userData = EC2Utils.getInstanceUserdata();
			StringTokenizer st = new StringTokenizer(userData);
			String accessId = st.nextToken();
			String secretKey = st.nextToken();
			String volumeOrSnapId = st.nextToken();

			Jec2 ec2 = new Jec2(accessId, secretKey);
			String volumeId = null;
			if (volumeOrSnapId.startsWith("snap-")) {
				String zone = EC2Utils.getInstanceMetadata("placement/availability-zone");
				// create volume from snapshot and wait
				VolumeInfo vinf = ec2.createVolume(null, volumeOrSnapId, zone);
				volumeId = vinf.getVolumeId();
				List<VolumeInfo> vols = ec2.describeVolumes(new String [] {volumeId});
				while (!vols.get(0).getStatus().equals("available")) {
					System.out.println(vols.get(0).getStatus());
					try { Thread.sleep(2); } catch (InterruptedException ex) {}
					vols = ec2.describeVolumes(new String [] {volumeId});
				}
			}
			if (volumeOrSnapId.startsWith("vol-")) {
				volumeId = volumeOrSnapId;
			}
			// attach volume and wait
			String instanceId = EC2Utils.getInstanceMetadata("instance-id");
			ec2.attachVolume(volumeId, instanceId, "/dev/sdh");
			List<VolumeInfo> vols = ec2.describeVolumes(new String [] {volumeId});
			while (!vols.get(0).getAttachmentInfo().get(0).getStatus().equals("attached")) {
				System.out.println(vols.get(0).getAttachmentInfo().get(0).getStatus());
				try { Thread.sleep(2); } catch (InterruptedException ex) {}
				vols = ec2.describeVolumes(new String [] {volumeId});
			}
		} catch (Exception ex) {
			System.err.println("Couldn't complete the attach : "+ex.getMessage());
			ex.printStackTrace();
			System.exit(-1);
		}
	}
}

Requirements

  • Java Runtime Environment (1.5 or greater)
  • Typica + and it’s dependencies
  • This utility (compiled)

A Few Words About the Code

The first thing you’ll notice is that user data is being parsed. The expectations are that the following items are passed via user data;

  • access id – AWS Access Id
  • secret key – AWS Secret Key
  • volumeOrSnapId – either a volume ID or snapshot ID

The code inspects the last parameter to see if it is a snapshot id. If so, it creates a volume and waits for it to become “available”. One that’s done, it gets the instance ID from meta data and attaches the volume at a hard-coded device.  (obviously, this could be in user data which is an exercise I’ll leave to the reader)

On a linux machines, I’d often call this from the /etc/rc.local script. I should also note that this works just as well with Eucalyptus due to its API fidelity with Amazon EC2

There you have it!

How to build a local NAS backed by Amazon S3

A previous post talked about my need for some local, reliable storage in my home. That project led to investigating some other options. Since I’m a big fan of Amazon S3, it seemed like something I should involve in my storage solution. The Elastician (Mitch Garnaat) and I bought the same hardware and are working through the setup together. Here’s the rundown of the hardware including costs;

Cooler Master Elite 360 m-ATX ATX Mid/Mini Tower Case with 350-Watt Power Supply RC-360-KKR1 $56.97
Gigabyte Core 2 Quad/Intel G41/DDR2/A&V&GbE/MATX/DualBIOS Motherboard GA-G41M-ES2L $56.99
Intel Pentium E5300 2.6GHz 2M L2 Cache 800MHz LGA775 Desktop Processor $66.99
Corsair XMS2 4 GB (2 X 2 GB) PC2-6400 800 MHz 240-PIN DDR2 Dual-Channel Memory Kit – TWIN2X4096-6400C5 $94.99
Western Digital 1 TB Caviar Green SATA Intellipower 64 MB Cache Bulk/OEM Desktop Hard Drive WD10EARS $54.49 * 2
Kingston DataTraveler 112 – 8 GB USB 2.0 Flash Drive DT112K/8GBCL (Black) $13.93 * 2
RadioShack® Molex® to SATA Power Cable $2.99

My previous post discusses the hardware in more detail and some of the choices. Here’s a picture of inside of the case once things were assembled. The observant among you would notice that one of the drives doesn’t have power. That’s because the case power supply didn’t have 2 SATA power connectors and the adapter cable was on order when this picture was taken. I’ll also point out that this case isn’t ideal for mounting several 3.5″ drives. With adapters, I can fit 4 in there, true. However, shopping around for something more to my liking is something I’d do differently next time. Thinking more about the software to run on the NAS has led to several projects including FreeNAS and OpenFiler. We decided to go with something we’re familiar with, Ubuntu. Ubuntu has instructions on their download page for creating a bootable flash drive. I tried the Mac OS-X method and failed, so I resorted the tool from pendrivelinux.com on the family window box. The Universal USB Installer they have works well and created good, bootable flash drives every time.

Creating a Bootable Flash Drive

I tried the Ubuntu Server download, but that seems to be geared towards jumpstarting a server install vs running right off the flash drive. The Ubuntu Desktop was much more to my liking.

To get things going, I needed to connect a mouse/keyboard/monitor. Once I configured the BIOS to boot from the USB HDD, it recognized the bootable flash drive and started bring Ubuntu up. It seems to take “forever” to boot up. I could hit “escape” to watch the console and found that it was timing out on the floppy drive, which I don’t have. I went into the BIOS settings to let it know there wasn’t a floppy drive attached and boot time went WAY down! I let the desktop come up, but since this is an install image, changes made aren’t saved. Having the 2nd flash drive will come in very handy now! Plug it into another USB port before prceeding. Select the “System”->”Administration” menus, then the “Install Ubuntu… ” option. There are steps on the install wizard that require special mention. On step 4, select “erase and use the entire disk”, and select your flash drive (not of the hard drivces!). In step 5, after you’ve entered the required information, select “log in automatically”, which will help when running headless later. Now the most critical part, step 7 has an “advanced” button you need to click. Make sure  you select the proper device, because it defaults to /dev/sda (the first hard drive). You need to select /dev/sdd, which is the last device connected (the target flash drive). Let the install proceed and you’ll have a bootable ubuntu image we can start configuring.

Remote Desktop for Administration

Once it was up, I could use the desktop and configure Remote Desktop. Having played with the default VNC server, it seemed like the wrong option. It didn’t run unless I had a monitor attached, so I did some digging and found that tightVNC is a popular alternative. There are a few steps to getting it installed and running at boot, detailed here.

For another means of access, its a good idea to install ssh (“apt-get install openssh-server”)

Configuring the RAID

The Disk Utility also has a menu option to configure the RAID. It uses mdadm, but I heard some folks talking about using lvm. Linux Mag has an article that talks about both. I decided to go with the built-in option.

Run “apt-get install mdadm” in a termal window. You can then use “Disk Utility” (on the “System”->”Administration” menu). One thing I noticed is that if you play around with RAID config or do your own partitioning of the drives, the RAID wizard isn’t really happy about using those drives. If this is the case, select each drive and then “Format Drive”. Select the “Don’t Partition” option to reset the drive state. You’ll find that you can now select the drives in the RAID setup wizard.

I’ve set the drives up in a RAID 0 config. Prior to doing this, I did a performance test on a single drive and got an average read rate of 84MB/sec. Once the RAID was configured and formatted, I ran the same performance test and got a read rate of 155MB/sec, which is approaching double the speed! Now that’s what I was hoping for!

To get the RAID started at boot time, edit the /etc/mdadm/mdadm.conf file and replace the existing “DEVICE” line with these 2 lines;

DEVICE /dev/sda1 /dev/sdb1
ARRAY /dev/md0 devices=/dev/sda1,/dev/sdb1 auto=yes

Next, run “dpkg-reconfigure mdadm” and accept the defaults. Thanks to goldfisch.at for the help.

Now, to get it mounted, add this to the /etc/fstab

/dev/md0	/mdeia/RAID	ext4	rw,nosuid,nodev,uhelper=udisks	1	2

I might have been able to say “defaults” in that options column, but I took what was there when I mounted the RAID manually using the disk utility.

Sharing the Storage

Initially, I’m setting up Samba to share with my household machines. I found this article at ubuntu.com to help me. I’m concerned with privacy, not because I don’t trust my family, but because I plan on backing up my laptop and I don’t want others messing with my files.

I created a “data” directory on the RAID drive. If you right-click on that folder, select “sharing options”. It brings up a dialog, and if you click “share this folder”, you’ll get prompted to install some packages (do it!). I discovered that I needed to use “smbpasswd” to set the share password. I’ll probably need to do this for each user I create to access the RAID.

The Amazon S3 Backup

For the Amazon S3 backup part, we’ve tossed around a number of different options. S3sync isn’t bad, but doesn’t allow for threaded uploads, and there’s the issue of how often do we kick it off. We asked, “what about running an S3 based filesystem and doing a RAID 1 on top of that and the RAID 0 local drives?”. That might be OK, but how about traffic control? What block size do we use, and what penalty do we pay for a larger block size when storing small files? Where do we store the local cache? Do we even want a local cache since we have a local disk array? Along those lines, we looked at S3Backer and others.

What is the solution when  you don’t really think the available options are great? Right your own! We think that we can write a daemon tied into the file system notification (pynotify) and use boto for the S3 part. Stay tuned… I smell another open source project!

Building an OpenSolaris NAS on the cheap

I’ve been shopping around for a packaged NAS solution that is inexpensive. I’ve looked at LG, Netgear, D-link, WD, Cisco and others. Ultimately, I found plenty of complaints about those and they all seem to have some set of limitations that I just didn’t want to have to deal with. Being a “Maker”, I jumped at the chance to build my own NAS and some people recommended I look at using OpenSolaris. I used SunOS back in the day, then Solaris for many years at work, so it seemed like familiar territory.

My requirements are fairly simple. I want to start with a GigE network connection and 2 1TB drives, in a RAID 1 config for fully redundant storage. The option of adding more drives later, and going to a more sophisticated RAID config would be nice. Our house has a Windows 7 machine for family use and my Mac OSX 10.6 laptop. Probably more machines to come later, and I want to support them all. Likely a mix of Windows/Mac and maybe some Linux down the road.

The other day, Amazon.com had some 1TB drives on sale so I jumped at them. They are WD Green drives, so they aren’t ideal for RAID, but they were  $56 each. For a more serious RAID box, you should really use a drive intended for that purpose. The big thing, aside from speed is to do with the Time Limited Error Recovery setting, which tells the drive to not spend time trying to recover data itself (which can hold up the controller for up to 2 minute), but to let the host handle things. RAID is good at this, so that’s why the drive ought to be configured for a short timeout.

Once I had those drives, I thought I’d see what I could piece together for an inexpensive system. I found a mini-tower case w/ power supply for $57 and MATX motherboard for $57, 4GB DDR2 RAM for $95 and a Core 2 Duo processor for $67. So far, we’re coming in < $400 before tax. Now, the next day, I realized I forgot to add a boot device. I wanted something more reliable than disc, and quite a bit cheaper. Flash drives fit the bill, so I picked up 2 8GB drives for $14 each. I figure I can boot off one, then script a backup to the other “just in case”. Here’s the list;

Cooler Master Elite 360 m-ATX ATX Mid/Mini Tower Case with 350-Watt Power Supply RC-360-KKR1 $56.97
Gigabyte Core 2 Quad/Intel G41/DDR2/A&V&GbE/MATX/DualBIOS Motherboard GA-G41M-ES2L $56.99
Intel Pentium E5300 2.6GHz 2M L2 Cache 800MHz LGA775 Desktop Processor $66.99
Corsair XMS2 4 GB (2 X 2 GB) PC2-6400 800 MHz 240-PIN DDR2 Dual-Channel Memory Kit – TWIN2X4096-6400C5 $94.99
Western Digital 1 TB Caviar Green SATA Intellipower 64 MB Cache Bulk/OEM Desktop Hard Drive WD10EARS $54.49 * 2
Kingston DataTraveler 112 – 8 GB USB 2.0 Flash Drive DT112K/8GBCL (Black) $13.93 * 2

Already, I can see that there are some things I might have done differently, like spend more on drives, less on RAM (smarter shopping, perhaps). On the plus side, with those “Green” drives and the power saving features on the motherboard, my NAS will probably consume less power than most. The parts are due to arrive over the next 2 days, so I’ll post more details and some pictures as I go.

UPDATE:  The direction has changed since I originally posted this and the project in its new form is being documented here.

A Unique Method of Authenticating against App-Managed Userlist

I have a project that uses Amazon’s SimpleDB service for data storage. Being a Java programmer, I have become fond of using JPA (Java Persistence Architecture) implementations. In some cases, I’ve used EclipseLink, but more recently I’ve been playing with SimpleJPA. This is a partial JPA implementation on top of SimpleDB. The benefits include writing value objects with minimal annotations to indicate relationships.

Anyway, enough about why I do it. Since my user list is also stored in JPA entities, I’d like to tie this into the container managed authentication. The web app I’m writing is being deployed to tomcat and so realms are used to define a authentication provider. Tomcat provides several realms that hook into a JDBC Database, JAAS, JNDI Datasource and more. In my case, I wanted to rely in data access via JPA. Before discussing the challenges, I should point out that in a Java web app container, there are different class loaders to contend with. The container has its own classloader, and each web application has its own. My application obviously contains all of the supporting jars for SimpleJPA and my value objects. Since authentication is being handled by the container, it doesn’t have access to my app’s classloader. So, I’d need to deploy about 12 jar files into the tomcat/lib directory to make them available to the container. One of those contains my value objects and could change in the future. I don’t think that’s a very nice deployment strategy (deploying a war, and then a separate jar for each software update).

To solve this problem, I had to come up with a way to write my own Realm with as few dependencies on my application as possible. What I came up with is a socket listener, running on a dedicated socket, within my web application. It only accepts connections from localhost, so it is not likely to become a security concern. The socket listener receives a username and returns username,password,role1,role2,… as a string. That is the contract between my web application and the authentication realm. The realm interfaces with the socket listener and uses that to get information about the user trying to authenticate, which is converts to the object format used within realms in tomcat.

The code for the socket listener is fairly simple;

package org.scalabletype.util;

import java.io.InputStream;
import java.io.IOException;
import java.io.OutputStream;
import java.net.InetAddress;
import java.net.Socket;
import java.net.ServerSocket;
import java.net.UnknownHostException;

import javax.persistence.EntityManager;
import javax.persistence.Query;

import org.apache.commons.logging.Log;
import org.apache.commons.logging.LogFactory;

import org.scalabletype.data.DataHelper;
import org.scalabletype.data.User;

/**
 * This class listens on a port, receives a username, looks up user record, then responds with data.
 */
public class AuthServer extends Thread {
	private static Log logger = LogFactory.getLog(AuthServer.class);
	public static final int AUTH_SOCKET = 2000;

	public AuthServer() { }

	public void run() {
		while (!isInterrupted()) {
			try {
				ServerSocket ss = new ServerSocket(AUTH_SOCKET);
				while (!isInterrupted()) {
					Socket sock = ss.accept();
					try {
						// confirm connection from localhost only
						InetAddress addr = sock.getInetAddress();
						if (addr.getHostName().equals("localhost")) {
							// get user to authenticate
							InputStream iStr = sock.getInputStream();
							byte [] buf = new byte[1024];
							int bytesRead = iStr.read(buf);
							String username = new String(buf, 0, bytesRead);
							logger.info("username to authenticate:"+username);

							// fetch user from JPA
							EntityManager em = DataHelper.getEntityManager();
							Query query = em.createQuery("select object(o) from User o where o.username = :name");
							query.setParameter("name", username);
							User usr = (User)query.getSingleResult();

							// return user data, or nothing
							OutputStream oStr = sock.getOutputStream();
							logger.info("got connection, going to respond");
							if (usr != null) {
								StringBuilder ret = new StringBuilder();
								ret.append(usr.getUsername());
								ret.append(",");
								ret.append(usr.getPassword());
								ret.append(",");
								ret.append(usr.getAuthGroups());
								oStr.write(ret.toString().getBytes());
							}
							oStr.flush();
						}
						sock.close();
					} catch (Exception ex) {
						logger.error("Some problem handling the request", ex);
					}
				}
			} catch (Exception ex) {
				logger.error("problem accepting connection. will keep going.", ex);
			}
		}
	}
}

The socket listener needs to be invoked when the web application is initialized and a ServletContextListener is a good place to do that;

public class ScalableTypeStarter implements ServletContextListener {
	private AuthServer auth;

	public void contextInitialized(ServletContextEvent evt) {
		// init data persistence layer
		DataHelper.initDataHelper(evt.getServletContext());

		// start authorization socket listener
		auth = new AuthServer();
		auth.start();
	}

	public void contextDestroyed(ServletContextEvent evt) {
		if (auth != null) {
			auth.interrupt();
			auth = null;
		}
	}
}

Here is the code for my realm, which is packaged by itself into a jar, and deployed (once) into the tomcat/lib directory.

package org.scalabletype.util;

import java.io.IOException;
import java.io.InputStream;
import java.io.OutputStream;
import java.net.Socket;
import java.net.UnknownHostException;
import java.security.Principal;
import java.util.ArrayList;
import java.util.Iterator;
import java.util.List;

import org.apache.catalina.Group;
import org.apache.catalina.Role;
import org.apache.catalina.User;
import org.apache.catalina.UserDatabase;
import org.apache.catalina.realm.GenericPrincipal;
import org.apache.catalina.realm.RealmBase;

/**
 * This realm authenticates against user data via the socket listener.
 *
 */
public class UserRealm extends RealmBase {
	public static final int AUTH_SOCKET = 2000;

    protected final String info = "org.scalabletype.util.UserRealm/1.0";
    protected static final String name = "UserRealm";

    /**
     * Return descriptive information about this Realm implementation and
     * the corresponding version number, in the format
     * <code>&lt;description&gt;/&lt;version&gt;</code>.
     */
    public String getInfo() {
        return info;
    }

    /**
     * Return <code>true</code> if the specified Principal has the specified
     * security role, within the context of this Realm; otherwise return
     * <code>false</code>. This implementation returns <code>true</code>
     * if the <code>User</code> has the role, or if any <code>Group</code>
     * that the <code>User</code> is a member of has the role. 
     *
     * @param principal Principal for whom the role is to be checked
     * @param role Security role to be checked
     */
    public boolean hasRole(Principal principal, String role) {
        if (principal instanceof GenericPrincipal) {
            GenericPrincipal gp = (GenericPrincipal)principal;
            if(gp.getUserPrincipal() instanceof User) {
                principal = gp.getUserPrincipal();
            }
        }
        if (!(principal instanceof User) ) {
            //Play nice with SSO and mixed Realms
            return super.hasRole(principal, role);
        }
        if ("*".equals(role)) {
            return true;
        } else if(role == null) {
            return false;
        }
        User user = (User)principal;
        UserInfo usr = findUser(user.getFullName());
        if (usr == null) {
            return false;
        } 
        for (String group : usr.groups) {
			if (role.equals(group)) return true;
		}
        return false;
    }
		
    /**
     * Return a short name for this Realm implementation.
     */
    protected String getName() {
        return name;
    }

    /**
     * Return the password associated with the given principal's user name.
     */
    protected String getPassword(String username) {
        UserInfo user = findUser(username);

        if (user == null) {
            return null;
        } 

        return (user.password);
    }

    /**
     * Return the Principal associated with the given user name.
     */
    protected Principal getPrincipal(String username) {
        UserInfo user = findUser(username);
        if(user == null) {
            return null;
        }

        List roles = new ArrayList();
        for (String group : user.groups) {
            roles.add(group);
        }
        return new GenericPrincipal(this, username, user.password, roles);
    }

	private UserInfo findUser(String username) {
		UserInfo user = new UserInfo();
		try {
			Socket sock = new Socket("localhost", AUTH_SOCKET);
			OutputStream oStr = sock.getOutputStream();
			oStr.write(username.getBytes());
			oStr.flush();
			InputStream iStr = sock.getInputStream();
			byte [] buf = new byte[4096];
			int len = iStr.read(buf);
			if (len == 0) {
				return null;
			}
			String [] data = new String(buf, 0, len).split(",");
			user.username = data[0];
			user.password = data[1];
			ArrayList<String> groups = new ArrayList<String>();
			for (int i=2; i<data.length; i++) {
				groups.add(data[i]);
			}
			user.groups = groups;
		} catch (UnknownHostException ex) {
			ex.printStackTrace();
		} catch (IOException ex) {
			ex.printStackTrace();
		}
		return user;
	}

	class UserInfo {
		String username;
		String password;
		List<String> groups;
	}
}

The web app’s context.xml contains this line to configure the realm;

<Realm className="org.scalabletype.util.UserRealm" resourceName="ScalableTypeAuth"/>

Amazon SimpleDB now available in the EU region

Amazon has just announced support for SimpleDB in their European data center. That means applications running in the EU will have lower latency when accessing SimpleDB. That’s good news for SimpleDB adoption. The EU SimpleDB is a totally separate version of the service as with S3 and EC2. So, you simply use the EU endpoint (sdb.eu-west-1.amazonaws.com) and it is business as usual.

The QueryTool now has built in support for region selection, which should make it easier to test queries and export data from both places. It is available for download here

Typica is ready for the EU. Simply create the SimpleDB object with the new EU endpoint (instead of the default US endpoint);

SimpleDB sdb = new SimpleDB(accessId, secretKey, true, “sdb.eu-west-1.amazonaws.com“);