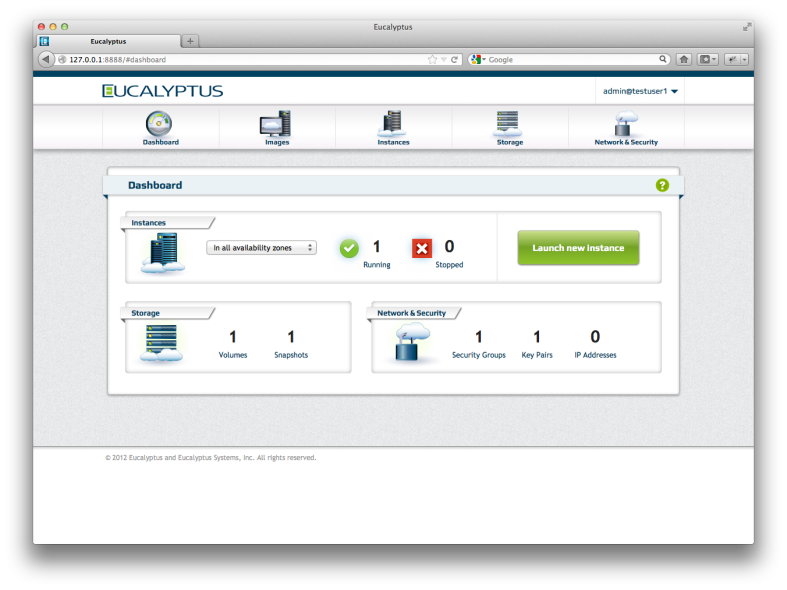
I previously posted some information about the new User Console we’ve been working on at Eucalyptus Systems. There has been a lot of activity and we’ve shown it to a lot of users to get feedback. We will be releasing it officially very soon, but till then, you can run it yourself a couple of ways. You can build from source, which is very easy, or install nightly builds which we provide for RHEL 6 and CentOS 5 and 6.
Did You Get the Package?
Packages are available in the nightly directory here:
http://downloads.eucalyptus.com/software/eucalyptus/nightly/3.2/
Configure the repo like this:
rpm -Uvh http://downloads.eucalyptus.com/software/eucalyptus/nightly/3.2/centos/6/x86_64/eucalyptus-release-3.2.0-0.1.el6.noarch.rpm
You’ll also need to have the elrepo configured as well.
rpm -Uvh http://elrepo.org/elrepo-release-6-4.el6.elrepo.noarch.rpm
Next, run
yum install -y eucalytpus-console
Next, you’ll need to configure the cloud location and perhaps some other things. The file is located in /etc/eucalyptus-console/console.ini The config file has a lot of settings, but there are just a few you need to understand to get going quickly.
clchost – this is the IP or dns name for the eucalyptus cloud you’ll connect to
uiport – defaults to 8888, but you can use a different port if you like
sslcert, sslkey – these values are used to configure SSL, which you don’t need to do for development
usemock – this is important if you don’t have a cloud to talk to. Setting this to true instructs the user console to load mock data and many features operate on the mock data (though many also don’t work as well). In this mode, the console can be run standalone for simple demos or to work on the browser side like when you want to changing branding or other look and feel items.
Now, start the service. You’ll see something like this;
# service eucalyptus-console start
Generating self-signed certificate: [ OK ]
Generating cookie secret: [ OK ]
Starting eucalyptus-console: [ OK ]
By default, SSL is enabled. You can connect to the application using https://localhost:8888/ (assuming you’re on the same host, otherwise substitute the right hostname or IP). Skip down to the “Once You’re Running” section below.
Using the Source
A source install is also very easy, but there are some differences you will need to be aware of. First, the code lives on github here: https://github.com/eucalyptus/eucalyptus/tree/maint/3.2/testing
Notice that I’m showing you the maint/3.2/testing branch. That is because we’re putting the very latest fixes there. If you’re a little more risk-averse, you may want to simply run from maint/3.2/master instead. We push changes from testing to master after the code has passed QA to a reasonable degree.
To get started, you’ll need;
- a git client
- python 2.6 (or 2.7)
- boto
- m2crypto
- tornado (2.1 or higher)
On CentOS 6,rpm -Uvh http://elrepo.org/elrepo-release-6-4.el6.elrepo.noarch.rpm yum install -y git python python-boto m2crypto python-tornadoor, Ubuntu 12.04,
sudo apt-get install git python-boto m2crypto python-tornadoNow, grab the source.
git clone git://github.com/eucalyptus/eucalyptus.git cd eucalyptus git checkout maint/3.2/testing git pull origin maint/3.2/testingFor better or for worse, the user console is in a subdirectory of the main eucalyptus source tree. This means you pull down a whole lot more than you really need if you're only interested in the console. The good news is that in the console directory, you have a completely independent project that doesn't have any build or run-time dependencies on the rest (aside from connecting to the cloud). To get the console running, you'll first need to configure one or two things. The console/eucaconsole/console.ini file has many settings, which we cover in the package install section above.
Once you've set things up to your liking, simply run
cd console ./launcher.shYou should see a message like "2012-11-10 23:56:43 INFO Starting Eucalyptus Console". If not, there may be other issues you need to fix first. If you have problems and need help, visit #eucalytpus-ui or one of the other #eucalyptus channels on freenode.net.
If you saw this message, that's great! It's very likely you're ready to connect with the browser. Assuming you are running the console on the same machine as your browser, use the appropriate localhost URL like "http://localhost:8888/" if you kept the default port and ssl config (off).
Once You're Running
You should see a login page. If you're using the mock (usemock: True), you can put anything in the fields, or nothing and simply login. If you're connecting to a Eucalyptus cloud, you'll need to use the regular web login credentials you'd use to login to the Eucalyptus admin console (read on...)
* Warning: Science Content *
The user console uses temporary session credentials from the STS service to make calls, so your actual access key and secret key are never passed to the console app. As a result, accounts that want to use the console must have a) a password set up and b) access credentials assigned. These things can be done by the cloud admin via the admin console or using euca2ools like this;
euare-accountcreate -a testuser1 euare-useraddloginprofile --delegate testuser1 -u admin -p euca123 euare-useraddkey --delegate testuser1 -u adminAnother way to do this would be using the Eucalyptus Admin UI which you can reach in your web browser here: https://<your-cloud-frontend>:8443/ and there are some helpful docs here.
Assuming you were able to login, you should be ready to explore!


3 thoughts on “Installing the Eucalyptus Console from source and packages”